A plugin update that looks harmless can break a checkout page, change a contact form, or conflict with a custom theme in seconds. That is why a guide to WordPress staging sites matters for any business that depends on its website for leads, sales, appointments, or credibility. A staging site gives you a controlled place to test changes before visitors see them.
For a small brochure site, staging may feel optional until a failed update creates an urgent repair job. For an online store, membership site, agency, or high-traffic business site, it is part of responsible website operations. The goal is simple: make changes with less risk, while keeping the live site fast, reliable, and available.
What Is a WordPress Staging Site?
A WordPress staging site is a private or restricted copy of your live website. It uses the same WordPress files, theme, plugins, settings, and usually a copy of the production database. Because it resembles the live environment, it lets you see how an update or design change is likely to behave before publishing it.
Think of your live site as production. It is where customers place orders, submit forms, and read your content. Staging is the test environment. You can update WordPress, try a new plugin, edit templates, revise CSS, or test performance settings without placing the public site at risk.
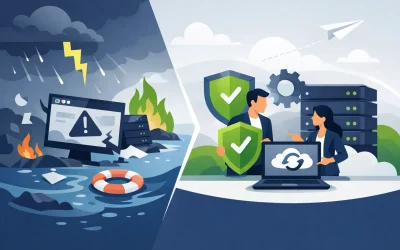
A staging site is not the same as a backup. A backup is a restore point that helps you recover after something goes wrong. Staging helps prevent avoidable problems in the first place. Both are necessary. A reliable backup gives you a way back; a staging site gives you a safer way forward.
Why Staging Is Worth the Extra Step
WordPress is flexible because it combines core software with themes, plugins, custom code, caching tools, and hosting-level settings. That flexibility also creates dependencies. A new version of one component may conflict with another, especially when a site has been customized over time.
Testing on staging can reveal issues that are hard to predict from release notes alone. A plugin update may alter form styling. A PHP version change may expose outdated code. A theme update may affect mobile navigation. An image optimization setting may interfere with product galleries. Finding these problems before deployment protects revenue and reduces last-minute support requests.
Staging also creates a better workflow for teams. A developer can prepare a change, a business owner can review it, and an agency can get approval before the change reaches production. Instead of making edits under pressure on a live site, everyone works from a defined process.
For sites with simple content and few plugins, a full staging cycle may not be required for every typo or new blog post. But changes to WordPress core, themes, plugins, payment functions, security settings, caching, and custom code deserve testing first.
How to Create a Staging Site
The best method depends on your hosting plan, technical comfort level, and how closely the staging environment needs to match production. Managed WordPress hosting often includes a staging feature in the account dashboard. This is typically the fastest option because the host copies the site files and database, creates a temporary address, and provides tools to push approved changes live.
If your hosting plan does not include one-click staging, you can create a manual staging environment. This usually means setting up a subdomain such as staging.yourdomain.com, copying WordPress files, cloning the database, updating configuration settings, and replacing URLs where needed. Developers may prefer this approach because it offers more control, but it requires care. A missed database setting or incorrect file permission can create security or functionality problems.
Some WordPress plugins can clone a site into a staging area. These can be useful on compatible hosting accounts, particularly for smaller websites. Before relying on a plugin-based staging setup, check server resource limits, database size, and whether the tool can safely handle large media libraries or eCommerce data.
Whatever method you choose, keep these four controls in place:
- Restrict access with password protection or an approved user login.
- Discourage search engines from indexing the staging site.
- Disable outbound email, payment processing, and other live integrations where practical.
- Confirm that staging uses current files and a recent database copy before major testing begins.
A staging site should be close enough to production to produce meaningful test results. Ideally, it runs the same PHP version, WordPress version, server configuration, active theme, and core plugins. If staging is much weaker or configured differently, a change can appear safe in testing but fail on the live server.
A Guide to WordPress Staging Sites: The Safe Update Process
Start with a verified backup of the live site. Do this even when you have automated backups running. Confirm that the backup includes both files and the database, and know how you would restore it if needed. For business-critical sites, keep more than one recent recovery point.
Next, refresh the staging copy so it reflects the current live site. This step is especially important if the site receives regular orders, form submissions, comments, bookings, or membership activity. Testing against an outdated copy can lead to false confidence.
Make one logical group of changes at a time. For example, update a single plugin and test it before moving to the next group. If you update WordPress core, ten plugins, the theme, and server settings at once, finding the source of a problem becomes far more difficult.
After each change, test the site as a visitor would. Do not stop at the homepage. Review the pages and actions that matter to your business, such as the navigation menu, contact forms, account logins, search, mobile layouts, product pages, cart and checkout steps, confirmation emails, and integrations with shipping, tax, CRM, or analytics platforms.
Use more than one browser and test on a phone as well as a desktop computer. Cached pages can hide problems, so clear relevant caches or use a private browsing window. Check the browser console if you have technical access, since JavaScript errors may not always be visible to a visitor.
When the changes pass testing, schedule the production deployment during a lower-traffic period if possible. Put the site into maintenance mode only when necessary, and keep the deployment window short. Once the changes are live, repeat the priority tests immediately. A good staging test reduces risk, but production has its own cache layers, traffic patterns, and connected services.
The Critical Challenge: Moving Changes Without Losing Data
Pushing a staging site to production is straightforward for a content site that has not changed since the staging copy was created. It becomes more complicated when live data is constantly changing.
An online store may receive orders while a developer is testing a new product template. A membership site may add subscribers. A booking site may receive appointments. If you overwrite the live database with an older staging database, you could erase customer records, orders, form entries, or other recent activity.
For dynamic sites, avoid treating a full database push as the default answer. Move only the files, templates, settings, or selected database changes required for the update when your tools support that approach. In some cases, a developer may use version control and a controlled deployment process rather than copying the entire staging site back to production.
This is where managed hosting and experienced support can save time. A provider such as Charter Hosting can help businesses choose an environment that fits their WordPress workflow, from a simpler managed setup to infrastructure with greater control for developers and agencies. The right option depends on how often you deploy changes, how much live data the site processes, and who manages the technical work.
Common Staging Mistakes to Avoid
The first mistake is allowing staging to become public. Search engines may index duplicate pages, and visitors may find an unfinished version of your site. Use access controls and search engine settings from the beginning.
The second is sending real emails or processing real payments from staging. Test order notifications with safe addresses and use payment provider sandbox settings whenever available. You do not want a customer receiving a test receipt or a staff inbox filling with messages generated by a cloned site.
The third is testing only the visual result. A page may look correct while a form fails, checkout taxes calculate incorrectly, or a security plugin blocks a legitimate action. Functional testing matters as much as design review.
Finally, do not let staging replace maintenance discipline. Keep WordPress, plugins, themes, PHP, backups, security monitoring, and access controls current. Staging supports a healthier process, but it cannot compensate for neglected infrastructure.
A staging site turns website changes from a live gamble into a planned operation. Build it into your maintenance routine, test what matters to your customers, and give every major update a safer place to prove itself before it reaches your business.