A Laravel site can look perfect on a local machine and still fail after deployment because the server is pointed at the wrong folder, the environment file is exposed, or background jobs never run. Knowing how to host a Laravel application means preparing the server for the framework, not simply uploading files and hoping for the best.
Laravel needs a hosting environment that supports current PHP versions, Composer dependencies, a database, cron scheduling, and, for many business applications, persistent queue workers. The right setup keeps customer data protected, pages fast, and routine application tasks running when they should.
Choose Hosting That Fits the Laravel Application
The best hosting plan depends on what the application does and how much control it needs. A small portfolio, internal tool, or early-stage business site may run well on a quality Linux shared hosting plan, provided it supports the PHP version and extensions required by the project. It is a practical starting point for applications with modest traffic and limited background processing.
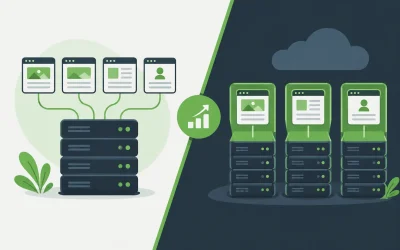
A VPS is often the better choice when an application handles regular sales, customer accounts, API traffic, queues, or scheduled processes. It gives you dedicated resources and control over server-level configuration. A dedicated server or cloud environment may be appropriate for high-traffic platforms, larger databases, or applications where performance and availability are business-critical.
Before choosing a plan, confirm that it supports the PHP version specified in your `composer.json` file. Laravel also commonly needs extensions such as BCMath, Ctype, cURL, DOM, Fileinfo, JSON, Mbstring, OpenSSL, PDO, Tokenizer, and XML. Requirements vary by Laravel version and the packages installed in the project, so check the application before provisioning the server.
Prepare the Server and Domain
Start with a Linux hosting environment using Apache or Nginx, PHP, and MySQL or MariaDB. Create the domain or subdomain where the application will run, then enable an SSL certificate before launch. HTTPS is essential for logins, checkout flows, contact forms, and any site that collects user information.
Create a separate database and database user for the application. Use a long, unique password and grant that user only the permissions needed for the database. Avoid using a shared administrative database account in the Laravel environment file.
You should also choose a supported PHP version and set a suitable memory limit. Basic Laravel sites may operate with 256 MB, but applications with image processing, large imports, reporting, or complex integrations can need more. If you are unsure, start with the project documentation and monitor memory-related errors after deployment.
Upload the Project With the Right Document Root
Laravel’s web-accessible directory is `public`, not the project root. This is one of the most important details in a secure deployment.
The project root contains files that visitors should never access directly, including `.env`, Composer files, application code, and configuration. Your domain’s document root must point to the `public` directory inside the Laravel project. For example, if the project is stored in `/home/account/apps/customer-portal`, the domain should serve `/home/account/apps/customer-portal/public`.
On a VPS or dedicated server, you can set this directly in the Apache virtual host or Nginx server block. On shared hosting, look for an option to set the domain document root or place the application in a directory structure that allows the domain to target its `public` folder. Do not solve this by copying the contents of `public` into a generic web root unless you fully understand and adjust the related paths. It can work in limited cases, but it is easier to make mistakes and expose sensitive files.
Upload the project through Git, SFTP, SSH, or a deployment workflow that matches your hosting environment. Exclude local development files, test artifacts, and unnecessary backups. If you use Git, keep `.env` out of the repository.
Install Dependencies and Configure Laravel
Once the code is on the server, install production dependencies from the project directory:
`composer install –no-dev –optimize-autoloader`
This installs the packages required by the application without development-only tools. If Composer is unavailable on a shared plan, dependencies can be built during deployment and uploaded with the project, although server-side Composer is usually easier to maintain.
Next, create the production `.env` file. Use the existing `.env.example` as a starting point, but do not copy local credentials into production. At minimum, set the application name, production URL, database connection details, mail settings, and any required third-party credentials.
Set `APP_ENV=production` and `APP_DEBUG=false`. Debug mode can reveal database queries, paths, environment values, and error details to visitors. Production errors should be logged for authorized administrators, not displayed publicly.
Generate an application key if one does not already exist:
`php artisan key:generate`
The application key protects encrypted cookies and other Laravel encryption features. Changing it after launch can invalidate active sessions and encrypted data, so treat it as a permanent secret once the site is live.
Set Permissions, Migrate the Database, and Cache Configuration
Laravel needs write access to the `storage` and `bootstrap/cache` directories. The exact user and group setup depends on the server, but the web server process must be able to write to these locations. Avoid broad 777 permissions. They may appear to fix an error, but they create unnecessary security exposure.
After confirming the database settings, run the application migrations:
`php artisan migrate –force`
The `–force` flag allows migrations to run in production. If the database already contains customer or order data, review migrations carefully before running them. A database backup and a tested staging deployment are sensible safeguards for any significant update.
For production performance, cache Laravel configuration, routes, and views where appropriate:
`php artisan config:cache`
`php artisan route:cache`
`php artisan view:cache`
Caching reduces repeated framework work on each request. The trade-off is that environment or configuration changes require clearing and rebuilding the relevant cache. Build that step into your deployment process so configuration changes do not appear to be ignored.
Configure Queues and Scheduled Tasks
Many Laravel applications rely on tasks that do not happen during a page request. Order emails, invoice generation, imports, notifications, subscription updates, and report processing may use queues. If your application dispatches jobs but no worker is running, those jobs remain pending.
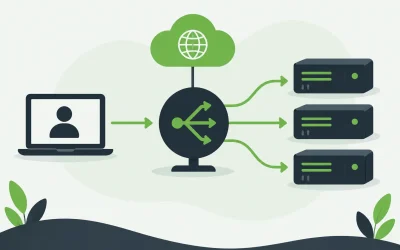
On a VPS, cloud server, or dedicated environment, run a queue worker under a process manager so it restarts automatically if it stops. For applications with meaningful workload, Redis is commonly a stronger queue backend than a database queue because it is designed for fast in-memory job handling. A database queue may be sufficient for small workloads, but it can add load as job volume grows.
Laravel’s scheduler also needs a cron entry that runs every minute:
` * php /path/to/project/artisan schedule:run >> /dev/null 2>&1`
This single cron task lets Laravel manage the schedule defined in the application. Confirm the PHP path and project path for your server. On shared hosting, cron jobs are often managed through the hosting control panel.
Secure and Monitor the Deployment
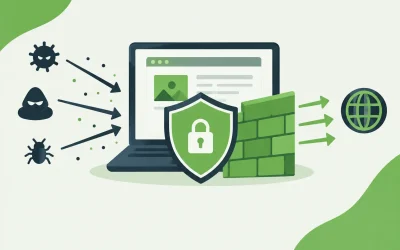
A production Laravel application needs more than a working homepage. Keep PHP, Laravel, Composer packages, and the operating system patched. Use SSL across the entire site, protect administrator accounts with strong passwords and multi-factor authentication where available, and keep backups separate from the live server.
Set up regular database and file backups, then test restoring them. A backup that has never been restored is only an assumption. For customer-facing applications, monitoring should cover uptime, SSL expiration, disk space, database growth, error logs, and response times.
Review Laravel logs in `storage/logs` when problems appear. A 500 error can result from missing permissions, an incorrect `.env` value, an unavailable PHP extension, a failed migration, or a cached configuration value. Reading the actual log message is faster and safer than changing random settings.
Build a Deployment Process You Can Repeat
Manual uploads are acceptable for a first launch, but repeatable deployments reduce risk as the application changes. Keep a written sequence for backups, code release, dependency installation, migrations, cache refreshes, queue restarts, and post-deployment testing. Even a simple checklist prevents common mistakes during a busy release.
Charter Hosting can support that path from an entry-level Linux hosting environment to VPS and dedicated infrastructure as your Laravel application needs more performance, control, and capacity. The goal is not to buy more server than you need on day one. It is to launch on dependable infrastructure and leave room to grow without turning the next release into an emergency.